Finding the right DAQ
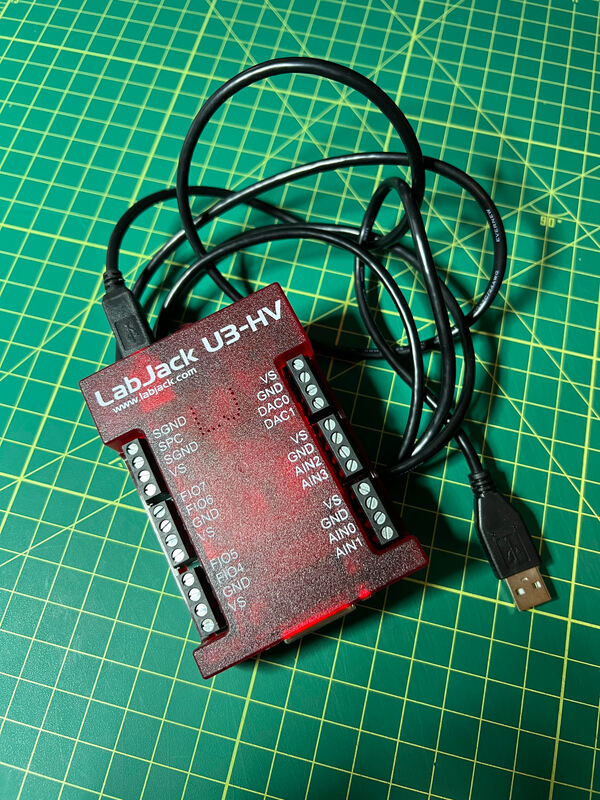
The LabJack U3-HVI was lucky that one of the guys on the team had a LabJack U3-HV that I could test out with LabVIEW. The following describes the install of the software and a simple compatibility test. The goal is to determine if this DAQ works with LabVIEW therefore when we scale for the larger device we should have confidence in the purchase. In order to use LabVIEW both the LabJack Driver and the Library needs to be downloaded. Follow these instruction here to get setup, its pretty straight forward. After install I opened the example program "U3 Multiple IO Example.vi." I then simply plugged in the U3-HV into my PC and ran the program. The DAQ connected with program and displayed open input floating data on the front panel. To validate it was actually working I stopped the program, unplugged the USB and ran the program again. The "Error Out" displayed a connection error, this gave me the confidence that LabVIEW is actually communicating with the Device. 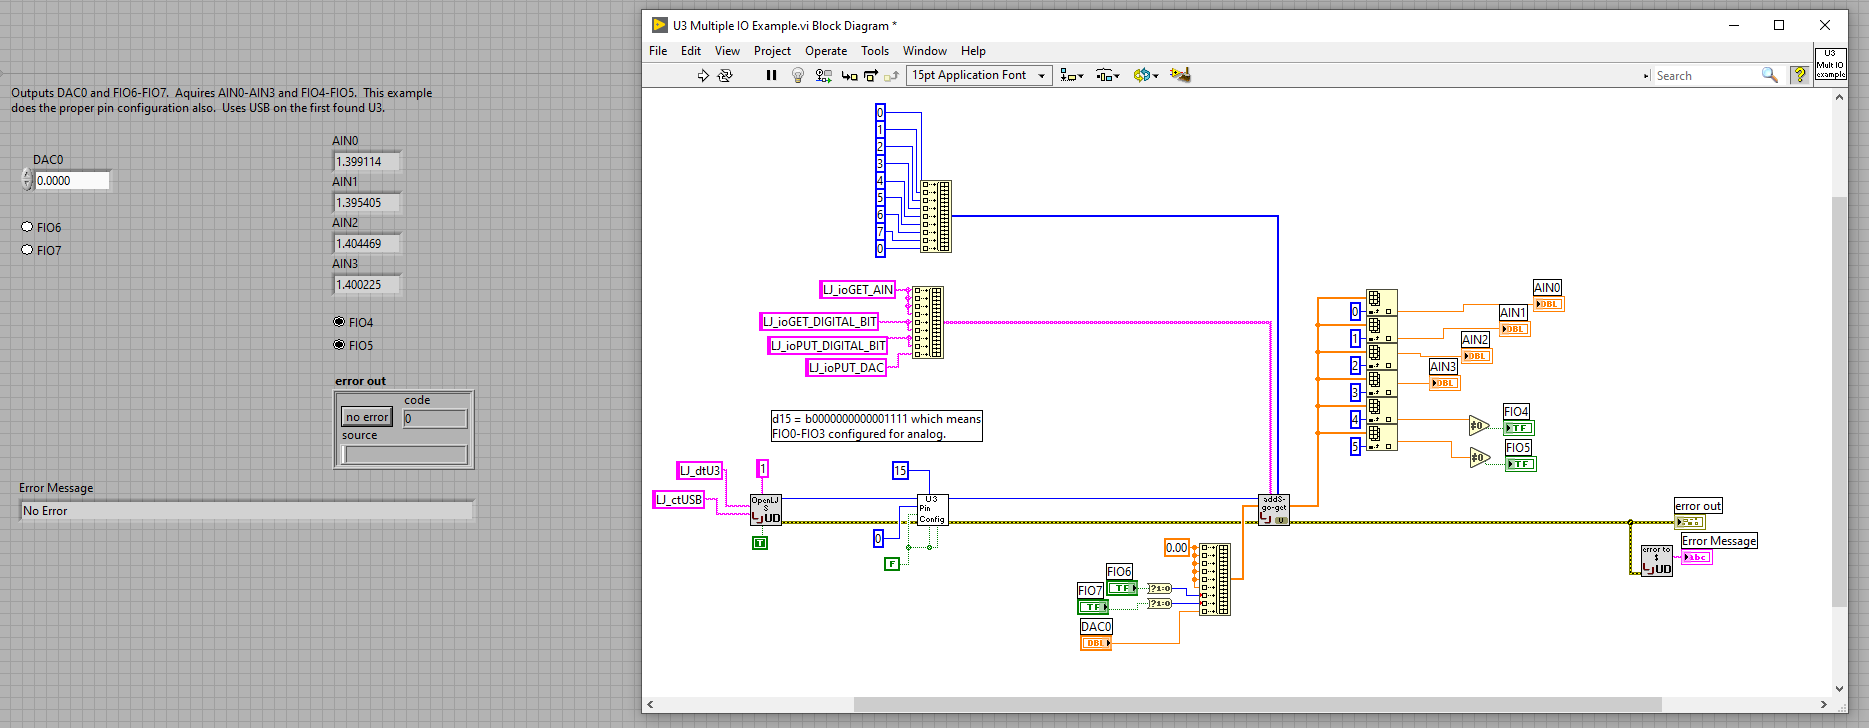
0 Comments
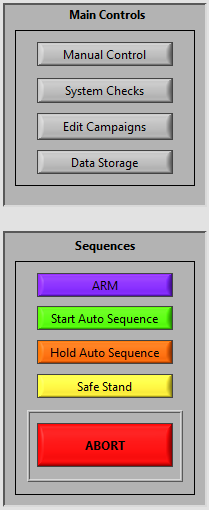
Definition: "A state machine reads a set of inputs and changes to a different states based on those inputs." Building the FoundationThere are usually two schools of when it comes to programing: The Linear Execution or The state machine. The Linear Execution: An example is the small code snippets that I discussed about coils. They serially operate code once in order then stop. The State Machine: Is a continuous loop that runs linear executions based on the input and reacts based on the results. Probably one of the most enjoyable things that I enjoy about LabVIEW is how easy it is to build state machines. The StatesThe point of this project is to safely execute a series of commands to hot fire lots of expensive hardware. Here is a list of states that I would like to incorporate so far:
Typically I like to build my state machines with the first state or default state as the Main or Wait state. This means all Inputs originate or wait at the Main and then cascade out to the other sates. Note: State 1 does not have a human input. This state in actuality is the first state that runs (typically once), this state re-initializes and nulls inputs. This state can be run again however only in special circumstances. 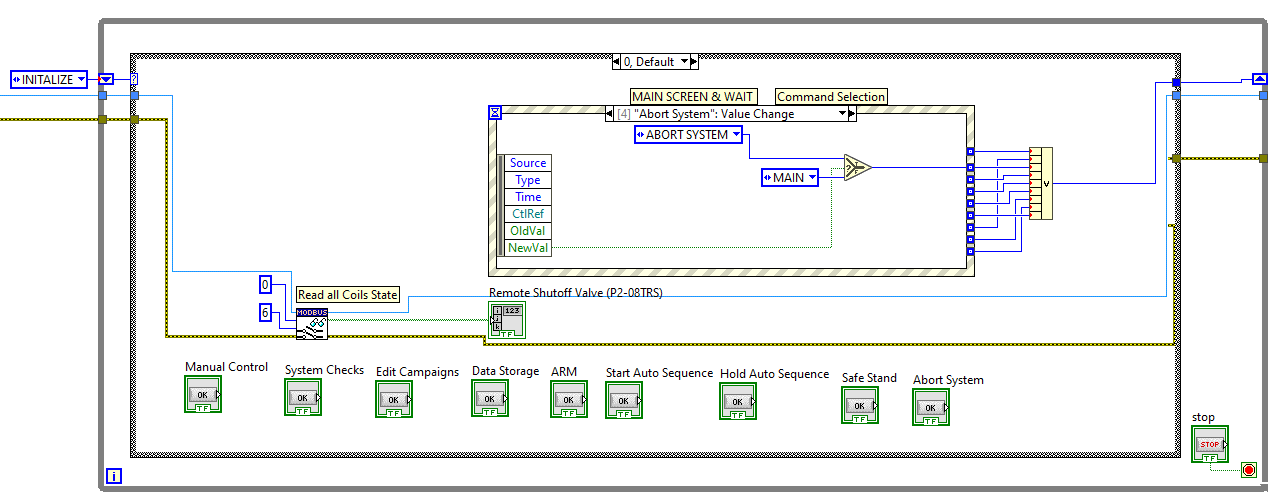 In LabVIEW tools, a state machine is simply a while loop with a shift register and a case structure. I personally like to add the use of a Event Structure coupled with the "Select" comparison tool to make the execution of the (Human controls) more stream lined. I also like to use "Enumerated Constants" this give a selectable string value to a numeric constant. This is helpful for code debugging and visuals, cuts down on the amount of labels. However, if more states needed to be added they all should be replaced to have the most current list. Executing the StateThe code snippet above shows the Abort sequence execution after the human control input is selected. When a change in Input value occurs state 5 is executed. Shown below: The linear execution code then runs turns off all coils, read the coils, and then gray & disable the test stand fire control inputs. This abort sequence will eventually get more tailored based on actual hardware, but for now helps me debug the states. After all code is executed in state 5 the "enum constant" returns the code to 0 to wait for the next input. 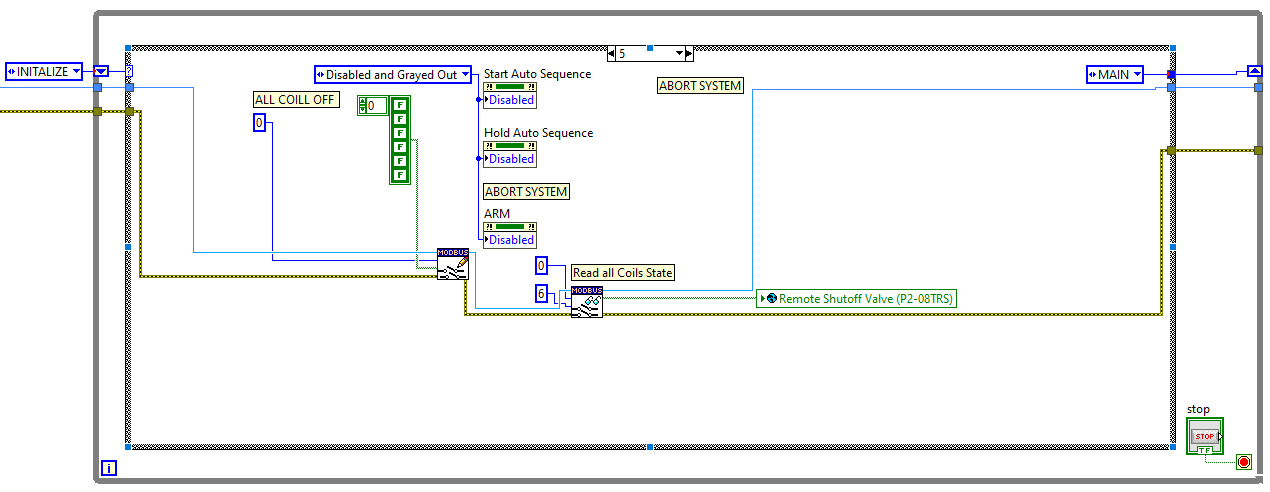 Future posts will discus the states in more detail when hardware is finalized.
|
Rocket Test Stand Controller ProjectThis blog will cover the development of my hybrid LabVIEW & PLC rocket engine controller. ArchivesCategories |
 RSS Feed